Skip to content

How to Upgrade Your HVAC System?

An aging furnace can rumble through a cold morning while a draft slips beneath the front door. That discomfort may signal a system worth assessing, but age alone does not prove replacement is needed. The U.S. Department of Energy’s Energy Saver guidance estimates that heating and cooling account for about 52% of a typical household’s energy use. That makes HVAC performance an important part of home energy costs. Still, the figure is an average, not a diagnosis of your house.

A sensible plan to upgrade hvac system starts with evidence: recent utility bills, room-by-room comfort, filter condition, equipment age, and a qualified technician’s inspection. The U.S. Energy Information Administration’s 2020 Residential Energy Consumption Survey also tracks home energy use by end use, offering context for how heating and cooling fit into household consumption. Don’t guess from the thermostat alone. Amory Lovins, energy-efficiency expert and co-founder of Rocky Mountain Institute, is often quoted as saying, “The cheapest energy is the energy you don’t use.” That principle supports checking insulation, air leaks, and controls before choosing new equipment.

This guide will explain how to compare repair and replacement, size equipment, assess efficiency ratings, and plan installation. It will also cover questions to ask contractors and details to verify in a written estimate. A larger unit is not automatically better. A rushed decision can leave you with uneven rooms, needless expense, or both. The right upgrade depends on your home, climate, budget, and measured heating and cooling needs.
How to Upgrade Your HVAC System?

Assess Your Existing HVAC System and Energy Needs

Before upgrading, document how your current HVAC system performs through different seasons. Note its age, repair history, filter condition, and any rooms that stay stuffy or unusually cold. Check recent utility bills, too; compare similar months rather than relying on one unusually hot week. Start with the evidence. A noisy outdoor unit or frequent cycling may point to trouble, but neither proves the equipment is undersized. Keep observations, not guesses.

Then look at the house’s actual heating and cooling needs. Have a qualified HVAC professional assess the home’s size, insulation, window exposure, air leakage, and ductwork. A room-by-room load calculation can help determine suitable capacity; simply replacing a unit with one of the same size may repeat an old mistake. Ask whether ducts leak or lack insulation, especially if the attic feels much hotter than the living room. That detail matters. Consider household changes, such as a finished basement, added insulation, or more occupants, because they can shift demand. Energy use can also reflect thermostat habits and local weather, so bills alone tell only part of the story. I have seen tidy equipment records miss a persistent comfort problem. Be willing to question the first explanation.

Choose Compatible Equipment and Define the Upgrade Scope

An HVAC upgrade should begin with the house, not a catalogue.

Record room temperatures, existing equipment capacity, electrical service, and duct dimensions. Then ask a qualified contractor to calculate heating and cooling loads using ACCA Manual J and select equipment using Manual S. These steps help match capacity to the building rather than its old unit. Bigger is not automatically better. An oversized system may cycle frequently and leave rooms less comfortable.

Duct condition belongs in the upgrade scope. The U.S. Department of Energy’s Energy Saver guidance estimates that typical homes lose about 20% to 30% of duct airflow through leaks, holes, and poor connections. Sealing or repairing ducts may therefore deserve attention before replacing equipment.

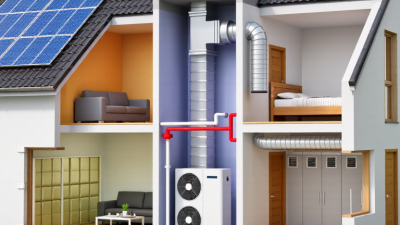
Check insulation, return-air paths, drain lines, and panel capacity, too. For homes replacing electric-resistance heating, DOE says heat pumps can use about 50% less electricity for heating. That figure is not a promise for every home; climate, controls, and installation matter.

I would not finalize equipment choices until those details are checked. Some measurements are inconvenient, but skipping them can make a “compatible” upgrade fit on paper only.

Plan the Installation, Permits, and System Compatibility

An HVAC upgrade starts with a site visit, not a shopping list. Ask the installer to inspect the existing equipment, ducts, electrical service, drain line, and thermostat. Small details matter. A new unit may fit the old opening but still conflict with the ductwork or electrical capacity. The U.S. Energy Information Administration’s 2020 Residential Energy Consumption Survey reports that space heating used 42% of household energy, while air conditioning used 9%. That makes correct sizing worth careful attention. Request a room-by-room load calculation, such as ACCA Manual J, rather than relying only on the old unit’s capacity.

Check local permit requirements before setting an installation date; rules and inspections vary by location. Confirm who will submit the paperwork and arrange any required inspection. Then review system compatibility: refrigerant lines, duct dimensions, airflow, controls, and available electrical capacity. Ask for the proposed equipment’s specifications in writing. DOE guidance emphasizes proper sizing and installation for efficient heat-pump performance. The plan can still miss something. A cramped attic, a blocked return grille, or an undersized wire can change the job. Leave time for corrections, and have the installer explain any needed duct or electrical work before removal begins.

How to Upgrade Your HVAC System: Plan the Installation, Permits, and Compatibility

Example planning allowances for common pre-installation steps, shown in business days. Actual schedules vary by contractor, equipment, project scope, and local permit-review times.

Before installation, confirm the home’s heating and cooling loads, electrical service, ductwork, and equipment requirements with a qualified HVAC professional. Check local permit requirements early; approval timelines differ by jurisdiction.

Install the New HVAC Equipment and Controls

Install the New HVAC Equipment and Controls

Before the new HVAC equipment is set in place, verify the design against the home’s actual conditions. A qualified installer should check load calculations, duct dimensions, electrical connections, condensate drainage, and required clearances. A unit that is too large may cycle frequently and leave rooms uncomfortable. Not every old duct will fit the new system. Inspect it rather than assuming.

The U.S. Department of Energy’s Energy Saver guidance says typical duct systems can lose 20%–30% of their airflow through leaks, holes, and poor connections. Seal and insulate accessible ducts before connecting the equipment. Small details matter. Install the thermostat where sunlight, drafts, and supply-air vents will not distort its readings. Set up schedules and temperature limits with the occupants, then test each operating mode. DOE guidance also notes that heating and cooling use nearly half of the energy in a typical home, so control settings affect both comfort and consumption. Record measured airflow, temperature differences, and control responses during commissioning. A neat display is not proof of good performance. Field adjustments may still be needed after occupants use the system for a few weeks.

How to Upgrade Your HVAC System? - Install the New HVAC Equipment and Controls

Installation Stage Equipment or Control Key Installation Checks Typical Verification Record at Completion
Prepare the site Indoor and outdoor equipment locations Confirm service access, clearances, structural support, and approved equipment placement before setting the units. Check the equipment installation instructions and applicable local requirements. Equipment locations and any site changes
Set indoor equipment Air handler or furnace and evaporator coil Level and secure the unit; seal duct connections; install required access panels and filters. Inspect for secure mounting, unobstructed service access, and air leakage at connected ductwork. Unit model, serial number, filter size, and installation observations
Set outdoor equipment Heat pump or air-conditioning condenser Place on a stable base, maintain specified clearances, and protect refrigerant piping from damage. Verify clearances and mounting requirements against the equipment instructions and local rules. Unit model, serial number, base condition, and clearance checks
Connect refrigerant lines Refrigerant piping and connections Use piping sized and installed for the selected equipment; pressure-test, evacuate, and insulate as specified. Document test results and evacuation readings; set refrigerant charge using the manufacturer’s procedure. Test pressure, evacuation reading, and final charge procedure
Connect condensate drainage Drain pan, drain line, and overflow protection Route the drain to an approved location, provide the required trap where applicable, and install overflow protection when required. Pour water into the pan and confirm free drainage without leaks or backup. Drain test result and overflow-protection check
Complete electrical work Disconnect, wiring, grounding, and overcurrent protection Use conductors and protection sized for the equipment nameplate and applicable electrical requirements. Verify connections, grounding, disconnect access, and voltage against equipment specifications. Supply voltage and electrical inspection results
Connect airflow system Supply and return ducts, filter, and registers Seal accessible duct joints, confirm the filter is correctly fitted, and keep return and supply paths unobstructed. Measure airflow and external static pressure; compare results with the equipment’s rated data. Airflow, static pressure, and filter details
Install and configure controls Thermostat, sensors, and equipment control wiring Match wiring and system settings to the installed heating and cooling equipment, including stages and auxiliary heat if present. Check temperature settings, operating mode, fan control, and communication or call signals. Control configuration and thermostat location
Start and test the system Complete HVAC system Run heating and cooling modes when conditions permit; check for unusual noise, vibration, leaks, or alarms. Measure operating temperatures and electrical readings using the equipment’s commissioning procedure. Mode-by-mode test results and any corrective work
Hand over the installation Owner information and maintenance access Show the owner how to use the controls, replace the filter, and locate shutoffs and service access points. Provide installation records, warranty documents, and maintenance instructions. Handover date and documents provided

Note: Required clearances, wiring, airflow, refrigerant procedures, and inspection criteria vary by equipment and location. Follow the equipment manufacturer’s instructions and applicable local codes; have refrigerant and electrical work completed by qualified professionals.

Test System Performance and Set Up Ongoing Maintenance

After an HVAC upgrade, treat the first full run as a performance test, not proof that everything is right. Ask a qualified technician to check airflow, temperature differences, electrical connections, and system pressure against the equipment’s specifications. With the system running, walk through each room. A bedroom that stays stuffy or a vent that whistles may point to balancing or duct issues.

Small clues matter. Note the outdoor temperature, thermostat setting, and how long the system takes to reach the target temperature. These readings are not perfect; sunlight, open doors, and cooking can skew them. Still, a dated record makes later changes easier to spot. Don’t adjust refrigerant or internal electrical parts yourself.

Set up maintenance around the manufacturer’s instructions and your home’s conditions. Check the filter monthly at first, especially if you have pets or nearby construction, and replace it when dirty or as directed. Keep outdoor coils clear of leaves, and leave enough space around the unit for airflow. Have a technician inspect the system seasonally or at the recommended interval, including drainage, controls, and refrigerant performance. If energy use rises or rooms grow unevenly warm, note when it began and share those details during the service visit. A log on the utility-room wall works; it may get missed sometimes, but a few honest notes beat relying on memory.