How to Upgrade Your HVAC System in 2026?
Upgrading an HVAC system in 2026 is not simply a matter of replacing an old furnace or air conditioner. The right decision starts with the home: its insulation, ductwork, room-by-room comfort, and energy bills. The U.S. Energy Information Administration’s 2020 Residential Energy Consumption Survey found that space heating and air conditioning together accounted for about half of household energy use. That makes equipment selection important, but it also shows why a new unit alone may not solve uneven temperatures or high bills.
A careful upgrade compares the existing system with the home’s actual heating and cooling loads. Ask a qualified contractor to assess sizing, duct leakage, thermostat controls, and ventilation before recommending equipment. The U.S. Department of Energy’s Energy Saver guidance also emphasizes proper sizing and installation for efficient operation. Amory Lovins, an energy-efficiency expert and Rocky Mountain Institute co-founder, is often credited with the reminder, “The cheapest energy is the energy you don’t use.” For HVAC planning, that points to a practical question: can air sealing or duct repairs reduce the required capacity before you buy a larger system?
There is no universal best choice. A heat pump may suit one home, while another needs a different setup or staged improvements. Check current equipment ratings, warranties, and any available incentives, since programs and eligibility can change. Get more than one written estimate. Compare the proposed model, installation scope, and projected operating costs—not just the headline price. Small details matter. A quiet bedroom, a draft near the hallway, or a return grille hidden behind furniture can reveal problems a sales quote may miss. A system upgrade can help, but only when the house and equipment are considered together.
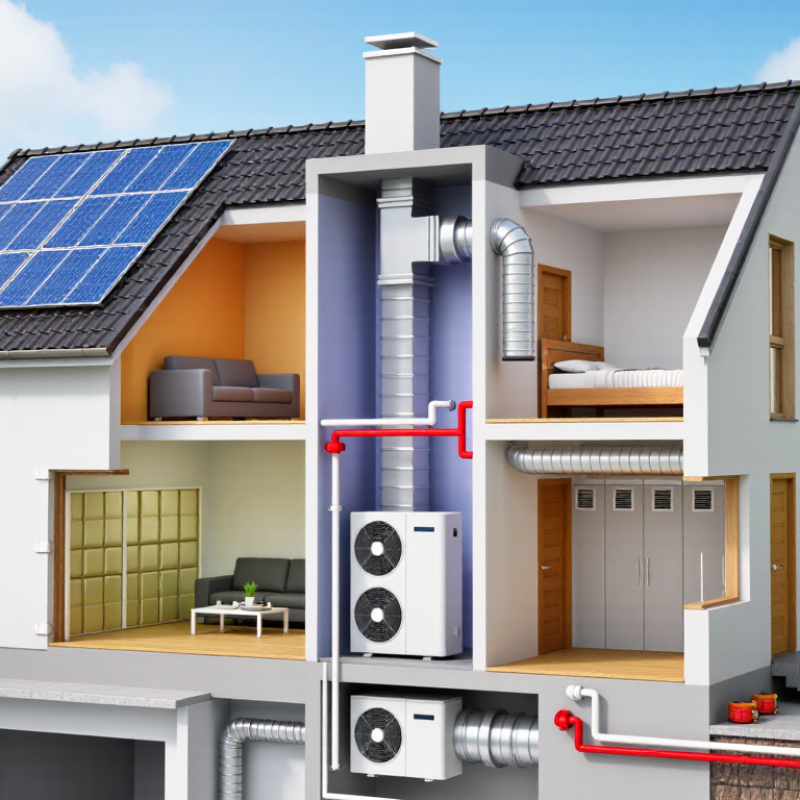
Assess Energy Use: EIA Says Heating and Cooling Near 50% of Home Energy
Before upgrading your HVAC system in 2026, measure how much energy heating and cooling actually use. The U.S. Energy Information Administration’s 2020 Residential Energy Consumption Survey (RECS) estimates that space heating used 42% of household site energy, while air conditioning used 9%. Together, that is about 51%. It is a useful national benchmark, not a diagnosis of your home. A drafty bedroom, shaded windows, or a poorly maintained system can change your own pattern.
Tips: Gather 12 months of utility bills. Note when the system runs longest, and check filters, vents, and thermostat settings. Ask a qualified HVAC professional to assess insulation, duct leakage, and room-by-room heating and cooling loads before recommending equipment. Bigger is not automatically better.
When comparing replacement options, review efficiency ratings and projected operating costs alongside the purchase price. Request written assumptions, including local energy rates and estimated usage. If one room stays chilly while another feels stuffy, mention it; that detail matters. I would not rely on one unusually high bill, though. Weather and household routines can skew the picture, and even careful estimates are imperfect.
Calculate the Load: Follow ACCA Manual J for Proper System Sizing
A Manual J load calculation estimates how much heating and cooling each room needs. It considers local climate, floor area, insulation, window size, air leakage, and household use. Not guesswork. A sunny room with large west-facing windows may need a different cooling allowance than a shaded bedroom.
Accurate measurements matter. A qualified HVAC professional should inspect the home, note window orientation, and assess insulation and duct conditions. They can use the results to guide equipment sizing, rather than relying only on the old system’s capacity. An oversized unit may cycle on and off too often, while an undersized one may struggle during extreme weather. Small details matter.
The process is not perfectly neat. Hidden air leaks or renovations can make initial assumptions inaccurate, so ask how the inputs were gathered and whether anything needs verification. Manual J is a standard method, not a promise that every home behaves exactly as predicted. Compare the load report with the proposed equipment capacity, and question unexplained differences. Good sizing starts with careful data—and a willingness to revisit it when the house tells a different story.
Compare Efficiency: ENERGY STAR Split ACs Start at 15.2 SEER2
Planning an HVAC upgrade in 2026? Compare seasonal efficiency ratings before choosing a split air conditioner. ENERGY STAR-qualified split systems start at 15.2 SEER2 in applicable categories. SEER2 estimates cooling efficiency under standardized test conditions; it does not guarantee a specific utility bill. Small distinction. Real-world energy use also depends on climate, thermostat settings, insulation, and installation quality.
Ask for the complete matched-system rating, not just the outdoor unit’s number. The indoor coil, air handler, and condenser need to work together. A qualified technician should calculate your home’s cooling load rather than simply copy the old unit’s size. Oversized equipment may cool rooms quickly but shut off before removing enough humidity. Cold, yet clammy. Have the contractor check duct leaks, airflow, and filter access while preparing the estimate.
Compare written quotes with the same rating basis, equipment scope, and installation details. A higher SEER2 number can mean lower cooling energy use, but the price difference may not suit every household or climate. One easy mistake is treating 15.2 as a savings guarantee. It is a comparison point, not a promise. Ask how the proposed system performs at your home’s typical summer temperatures, and whether duct repairs or insulation improvements could affect the results.
Check Refrigerants: EPA’s 2025 Rule Caps New-System GWP at 700
How to Upgrade Your HVAC System in 2026?
Planning an HVAC upgrade in 2026? Check the refrigerant before comparing equipment prices. Under the U.S. EPA’s refrigerant transition rules, many new residential and light-commercial air conditioners and heat pumps are subject to a 700 GWP limit. GWP measures how strongly a refrigerant warms the atmosphere compared with carbon dioxide over a set period. Exact requirements and dates depend on equipment type, so do not assume every system follows the same schedule.
Ask your contractor to identify the refrigerant in the proposed model and confirm that the equipment meets the rules applicable to its category and installation date. Request the model’s technical sheet, not just a verbal assurance. A clear answer should include the refrigerant designation and its stated GWP. Check the outdoor unit’s label, too; it can help verify what was installed later.
The refrigerant matters, but so does the installation. A system that is poorly sized or has leaky ductwork may waste energy, even with a lower-GWP refrigerant. Have the contractor assess insulation, airflow, and room-by-room heating or cooling needs. Existing equipment does not automatically need replacement just because refrigerant rules are changing. That detail is easy to overlook. And regulations can be confusing; I would ask for the relevant EPA guidance in writing before signing.
How to Upgrade Your HVAC System in 2026?
Check refrigerants: EPA’s 2025 rule generally limits refrigerants in covered new residential and light-commercial air-conditioning and heat-pump systems to a GWP of 700, subject to scope and exemptions.
R-32 (675) and R-454B (466) are below the 700 benchmark; R-410A (2,088) and R-22 (1,810) are above it. GWP figures are commonly cited 100-year estimates and may vary by assessment method. The rule applies to covered new systems; check requirements for the specific application.
Inspect Ducts: DOE Estimates Leaks Waste 20–30% of Moving Air
When upgrading an HVAC system in 2026, inspect the ducts before choosing larger equipment. The U.S. Department of Energy estimates that typical duct leaks waste 20–30% of the air moving through a system. That lost air may escape into an attic, crawlspace, or wall cavity instead of reaching the rooms you use. Small gaps matter. A dusty ring around a vent, a loose joint, or a bedroom that stays stuffy can point to trouble, though none proves a leak by itself.
The U.S. Environmental Protection Agency’s duct-sealing guidance also warns that leaking ducts can reduce comfort and system efficiency. Ask a qualified technician to inspect connections and measure duct leakage, rather than relying on a quick visual check. Mastic or approved metal-backed tape can seal accessible joints; ordinary cloth-backed duct tape may deteriorate. Seal first, then reassess the equipment size. Otherwise, a new system may be selected around losses that could have been fixed. There is a catch: ducts buried behind walls are harder to inspect, and sealing every visible seam does not guarantee balanced airflow. Keep the test results and ask what remains uncertain.
How to Upgrade Your HVAC System in 2026? — Inspect Ducts: DOE Estimates Leaks Waste 20–30% of Moving Air
| Inspection Dimension |
What to Check |
Why It Matters |
Practical Next Step |
| Air leakage |
Look for disconnected sections, gaps, and loose joints, especially near the air handler and at duct connections. |
The U.S. Department of Energy estimates that leaky ducts can waste 20–30% of the air moving through the system. |
Have suspected leaks evaluated and sealed with appropriate duct mastic or listed foil tape. |
| Duct condition |
Check accessible ducts for crushed, sagging, kinked, or visibly damaged sections. |
Physical damage can restrict airflow or contribute to air escaping from the duct system. |
Ask an HVAC professional to repair or replace damaged sections and support flexible ducts properly. |
| Insulation |
Inspect ducts in attics, crawl spaces, garages, and other unconditioned areas for missing or damaged insulation. |
Insulation helps limit heat gain or heat loss as conditioned air travels through these spaces. |
Check local energy-code requirements and have insulation repaired or added where appropriate. |
| Airflow balance |
Note rooms with weak airflow or temperatures that differ noticeably from the rest of the home. |
Uneven comfort can be associated with duct restrictions, leakage, or system-balancing issues. |
Request airflow checks at the registers and a duct-system assessment before replacing equipment. |
| Leak testing |
Ask whether a duct-leakage or pressure test is appropriate for the home and its HVAC system. |
Testing can help identify leakage that is not visible during a basic visual inspection. |
Use test results to prioritize repairs, then consider retesting to verify the work. |
| Upgrade planning |
Review duct condition and airflow before selecting replacement heating or cooling equipment. |
A new HVAC unit cannot correct duct leaks or restrictions by itself. |
Address duct problems as part of the upgrade plan and confirm the new equipment is matched to the home. |