
Skip to content

How to Use a Heat Gun Safely and Effectively

A Heat Gun can soften paint, shrink tubing, loosen adhesives, and shape certain materials with controlled heat. Its compact body may look simple, but the nozzle can reach temperatures high enough to burn skin, ignite nearby materials, or damage a work surface. The danger is easy to underestimate. Heat is invisible.

This guide explains how to choose a suitable setting, prepare a stable workspace, and keep the tool moving at a safe distance. It also covers protective equipment, ventilation, cooling, and storage. Check the manufacturer’s instructions for your specific model; temperature controls and safe operating distances vary. Clear away paper, solvents, and other flammable items before switching the tool on. Keep the cord behind you, and never point the nozzle at yourself or another person.

Experience helps, but it does not replace patience or reliable instructions. Test the heat on an inconspicuous area when the material allows it. Some surfaces change color or release fumes before damage becomes obvious. Stop if the material smokes, blisters unexpectedly, or smells unusual. I have found that rushing often causes uneven results, and a setting that worked once may not suit another material. Let the tool cool fully in a safe place before putting it away. With careful setup and steady handling, a heat gun can be useful without turning a routine task into a preventable accident.
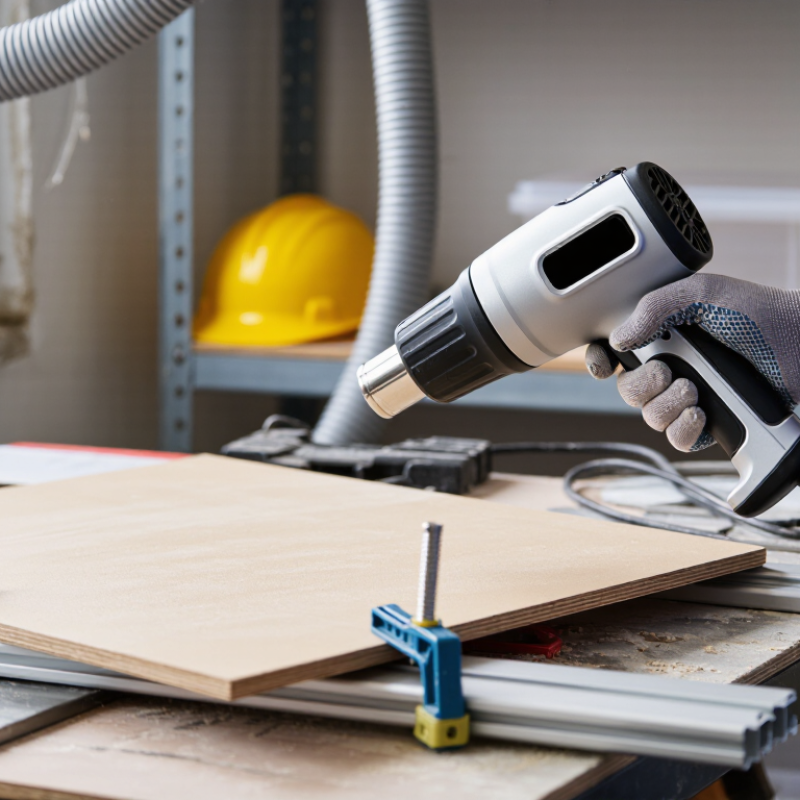
How to Use a Heat Gun Safely and Effectively

Check the Tool’s Rated Range: Many Heat Guns Reach 1,000°F or More

A heat gun’s rating is not a promise that every setting feels the same. Many models can reach 1,000°F or more at the nozzle, hot enough to blister paint or scorch wood quickly. Check the tool’s rated range and operating instructions before plugging it in. A maximum temperature describes capability, not a safe target for every task.

Start with a lower setting and hold the nozzle well away from the surface. Move it steadily, like a small stream of warm air, rather than aiming at one spot. Test an inconspicuous area first; old paint, thin plastic, and nearby finishes can react differently than expected. Keep a thermometer or the material maker’s guidance handy when temperature matters. The air can be hotter than the surface looks.

Clear the work area of paper, cloth, and other items that could ignite. Wear eye protection and heat-resistant gloves, and provide ventilation when warming coatings or adhesives. Never touch the nozzle to check whether it has cooled. Set the gun on a stable, heat-safe surface after use, and unplug it before leaving the room. I still find temperature ratings easy to overread: distance, airflow, and time change the result, and a quick test can prevent a costly mark.

Identify Lead Paint: EPA Bars Heat Guns Above 1,100°F for Lead Removal

Before using a heat gun on old paint, find out whether the coating contains lead. Paint in older homes may contain lead even when it looks intact. A home test can help, but uncertain results need a qualified lead inspector or risk assessor. Don’t guess.

The EPA’s Renovation, Repair and Painting rule prohibits using heat guns above 1,100°F to remove paint during covered renovation work. That limit is not a guarantee that lower temperatures are safe. Heated lead paint can create hazardous fumes, while scraping nearby can spread contaminated dust onto floors, windowsills, and clothing. If lead is present or suspected, stop and use a lead-safe professional. Keep children and pregnant people away from the work area.

If testing confirms the paint is lead-free, follow the heat gun’s instructions and check the temperature setting before starting. Keep the nozzle moving; holding it over one spot can scorch the surface or start a fire. Wear eye protection and suitable gloves, and keep the work area clear of anything flammable. Ventilation helps, but it cannot make unsafe paint removal safe. It’s easy to feel confident after one quick test. I wouldn’t rely on a doubtful result.

Prepare a Clear Work Area and Wear Heat-Resistant Gloves and Eye Protection

How to Use a Heat Gun Safely and Effectively

Clear the work area before plugging in the heat gun. Move paper, cloth, solvents, and other flammable items well away from the workpiece. Check the floor for scraps, too. A tidy bench can still hide a loose cable or a plastic container near the hot-air stream. Set the tool on a stable, heat-resistant surface when it is not in use, and keep its cord clear of your working path. Good ventilation matters, especially when heating coatings or materials that may give off fumes.

Wear heat-resistant gloves and safety glasses with side coverage. Gloves help protect your hands when handling warm materials, but they do not make the nozzle safe to touch. It stays hot after the tool is switched off. Eye protection can help shield you from dust, flakes, or small splashes released as a surface softens. Follow the tool’s instructions, and pause if your gloves or glasses make it hard to grip or see clearly. That trade-off is easy to overlook.

Tips: Keep a clear landing spot for the tool. Let it cool fully before storing it. If the work area feels cramped, stop and rearrange it first. A few seconds of preparation can prevent a rushed mistake.

How to Use a Heat Gun Safely and Effectively — Prepare a Clear Work Area and Wear Heat-Resistant Gloves and Eye Protection
Safety Area Recommended Practice Why It Matters Before You Begin
Work area Clear the work surface and nearby floor of paper, fabric, solvents, aerosols, and other combustible materials. Keep the workpiece on a stable, heat-resistant surface. The hot air stream and heated nozzle can ignite or damage nearby materials. ☐ Clear surrounding area
Ventilation Work in a well-ventilated area. Check the material’s instructions before heating coatings, plastics, or adhesives, which may release hazardous fumes. Heating some materials can produce irritating or harmful vapors. ☐ Provide suitable airflow
Hand protection Wear heat-resistant gloves when handling hot workpieces or accessories. Gloves do not make it safe to touch the nozzle or direct hot air at your hands. The nozzle, heated material, and accessories may remain hot after use. ☐ Wear appropriate gloves
Eye protection Wear safety glasses or other suitable eye protection while operating the tool, especially when removing coatings or working with brittle materials. Flying debris and splashes from softened material can injure the eyes. ☐ Put on eye protection
Tool inspection Check the power cord, plug, housing, and nozzle for damage. Use the heat gun only as described in its operating instructions. Damaged equipment or unsuitable attachments can increase the risk of electric shock, burns, or fire. ☐ Tool is in good condition
During operation Keep the nozzle moving and aimed only at the intended work surface. Keep the hot-air outlet away from people, pets, cords, and combustible objects. Concentrated heat can burn skin, damage objects, or start a fire. ☐ Maintain control of the hot-air stream
When pausing Set the tool on its designated stand or on a stable, noncombustible surface with the nozzle directed away from people and materials. A hot nozzle can burn surfaces or ignite nearby items if the tool is set down carelessly. ☐ Use a safe resting position
After use Switch off and unplug the heat gun. Allow it to cool in a safe place before storing it; do not touch the nozzle while it is hot. The nozzle and accessories can stay hot after the motor stops. ☐ Unplug and allow to cool
Fire readiness Keep a suitable fire extinguisher accessible and remain in the work area while the tool is operating. Check the work area for heat or smoldering materials afterward. Combustible materials may continue heating or begin to smolder after direct heating stops. ☐ Stay nearby and inspect the area

Set the Temperature and Keep the Nozzle Moving to Reduce Fire Risk

A heat gun can soften paint, shrink tubing, or loosen adhesive, but concentrated heat can ignite nearby materials. Check the tool’s instructions and choose a temperature suited to the material. If you are unsure, start low and test an inconspicuous spot. Small changes matter.

Keep the nozzle moving in slow, steady passes. Hold it at the distance recommended in the manual, and avoid aiming at one point for long. Watch the surface, not just the tool: bubbling, darkening, or smoke means stop and reassess. Clear away paper, cloth, and other flammable items, and work where air can circulate. Even careful work can surprise you; heat may linger after the surface looks cool.

Tips: Wear heat-resistant gloves and eye protection. Set the gun on its stand between passes, never on a workbench edge. Let the tool cool fully before storing it, and unplug it when finished. Don’t rush the cooling step.

Heat Gun Temperature Settings: Use the Lowest Effective Heat

These broad temperature bands illustrate settings found on adjustable heat guns; they are not universal standards. Actual ranges vary by tool. Check the manufacturer’s instructions and the material’s heat limits, start low, and increase gradually. Keep the nozzle moving and away from flammable materials to reduce the risk of overheating or fire.

Unplug the Tool and Let the Nozzle Cool Before Storage

After the last pass, switch off the heat gun and unplug it by the plug, not the cord. Place it on a stable, non-combustible surface, with the nozzle facing away from people, walls, and loose materials. Keep paper, fabric, and flammable liquids well clear. The nozzle may remain hot after the motor stops. Not yet. Don’t touch it to check; wait until it has cooled completely, following the cooling guidance in the tool’s manual. Cooling time varies by model and use.

It is tempting to pack the tool away as soon as the work is done. That small shortcut can expose hands or nearby items to residual heat. NFPA’s report on home heating equipment fires estimates an annual average of 44,210 such fires in the United States during 2016–2020. The category covers heating equipment broadly, not heat guns specifically, but it underlines why hot equipment deserves care. Give it time. Before storage, check that the nozzle and air openings are clear, then keep the unplugged tool in a dry place where children cannot reach it. I still find the waiting part easy to rush. A cool nozzle is worth the extra minute.

Article Source: