
Skip to content

How to Choose Magnetic Track Lighting

Choosing Magnetic Track Lighting is less about picking a sleek rail and more about matching light to the room. A kitchen counter needs clear, even illumination. A textured wall benefits from a narrower beam, aimed carefully to reveal its surface. Before comparing finishes, check the system voltage, compatible fixtures, driver capacity, dimming method, and planned track layout.

The U.S. Department of Energy’s LED Basics reports that LEDs use at least 75% less energy and last up to 25 times longer than incandescent lighting. That benchmark describes LEDs generally, not every magnetic track system. The International Energy Agency has also highlighted lighting efficiency as an important part of reducing electricity demand. Still, efficiency figures alone cannot tell you whether a fitting will render food naturally or create glare on a glossy screen.

Architect Louis Kahn observed, “The sun never knew how great it was until it hit the side of a building.” His words point to a useful design truth: light matters through what it reveals. For Magnetic Track Lighting, that means checking beam angle, color rendering, and color temperature against real surfaces, not just a product photo. There is no universal best setup. I would test one fixture on the actual wall first; even a small mismatch can feel obvious at night.
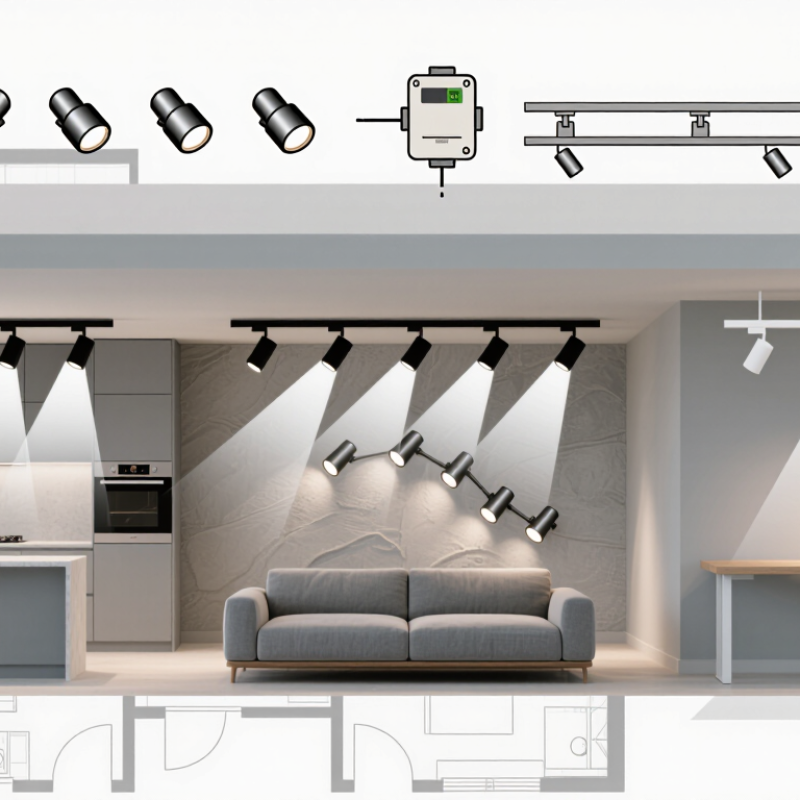
How to Choose Magnetic Track Lighting

Identify the Room’s Lighting Needs and Intended Uses

Before choosing magnetic track lighting, note how each room is actually used throughout the day. A kitchen may need bright, even light over counters, while a dining area benefits from softer light above the table. Walk through the room at different times. Notice dark corners, screen glare, and shadows cast by cabinets or shelves. Small details matter.

List the tasks that need light, not just the rooms. In a home office, aim adjustable fixtures at the desk without reflecting light into the monitor. In a living room, use separate beams for reading chairs, artwork, and general illumination. A narrow beam can highlight a framed picture, but it may leave nearby surfaces too dim. For a long hallway, check that the light reaches the floor evenly between fixtures. Track systems allow fixtures to move, which helps when furniture changes, but they cannot fix poor placement by themselves. I would not assume one layout suits every room; test positions with temporary lamps if possible. Measure the ceiling height and note where doors, beams, and cabinets may block a fixture’s aim. Then choose light levels and color appearance that fit the room’s tasks, rather than relying on appearance alone.

Understand Magnetic Track Systems and Their Components

A magnetic track system is more than a slim rail on the ceiling. It combines a track, a power supply, electrical connections, and compatible light modules. The track carries low-voltage power and provides the physical channel where fixtures attach. Some systems use surface-mounted rails; others sit recessed into a ceiling. The installation method affects appearance, access, and the work required before the ceiling is finished.

The power supply converts household electricity to the voltage required by the track. Its capacity must suit the combined load of the installed lights, with room for any planned additions. Feed connectors bring power into the rail, while straight, corner, or flexible connectors join track sections. Check that every component is designed for the same system; magnetic attachment alone does not guarantee electrical compatibility. It sounds simple. It isn’t always.

Light modules may include spotlights, linear bars, or pendants, each shaping light differently. A narrow spotlight can pick out a kitchen counter, while a linear module spreads softer light along a hallway. Before choosing, sketch the room and note furniture, ceiling height, and likely shadows. A common planning mistake is placing every fixture evenly, even when the room’s tasks are not evenly distributed. Leave space for adjustment, and verify load limits and installation requirements in the system instructions. For mains wiring, use a qualified electrician. A neat layout on paper can still feel wrong once furniture is in place.

Choose a Track Layout, Mounting Style, and Power Supply

Begin with the track layout, based on what the room needs rather than a fashionable shape. A straight run can light a kitchen counter or hallway efficiently. An L-shaped layout can reach around a corner, while a rectangular route may suit a larger room. Mark the proposed path on the ceiling with painter’s tape. Stand beneath it and check whether the light will reach work surfaces without shining directly into your eyes. A plan can look tidy on paper and still feel awkward in the room. Adjust it before buying components.

Choose a mounting style that suits the ceiling and the finished look. Surface-mounted tracks are practical when you cannot alter the ceiling; recessed tracks need suitable space and installation planning. Suspended tracks can work well under high ceilings, but their drop height matters. Measure carefully. Then select a power supply compatible with the track’s voltage and total fixture load, leaving capacity within its rated limit. Check the manufacturer’s specifications, and ask a qualified electrician to assess wiring or installation concerns. Small details count. I would double-check connector compatibility, too; it is easy to assume every track component fits, and that assumption can cost time.

How to Choose Magnetic Track Lighting

Compare example track layouts, mounting styles, connected loads, and power-supply capacities.

These examples assume 12 W per light: a 4 m straight surface-mounted track with 4 lights uses 48 W; a 5 m L-shaped suspended track with 6 lights uses 72 W; and a 6 m U-shaped recessed track with 8 lights uses 96 W. Suggested supply capacities provide approximately 25% headroom. Confirm fixture wattage, track limits, and installation requirements with the product specifications.

Select Compatible Fixtures, Beam Angles, and Light Color

A magnetic track system is not automatically compatible with every magnetic fixture. Check the track’s connection type, voltage, and maximum load against each light’s specifications. If documentation is unclear, ask the supplier or a qualified electrician before buying. A snug fit matters. So does a secure electrical connection.

Choose beam angles for the job, not just the room. A narrow beam can highlight artwork or a countertop, but may create harsh pools of light. Wider beams spread light across a dining table or hallway. Ceiling height changes the result: a beam that feels focused in a low room may look scattered under a tall ceiling. Mock up the layout when possible. It can save a frustrating return.

Light color affects how materials appear. Warm white often feels comfortable in living areas, while neutral white can suit kitchens and workspaces. Compare samples beside your actual wall paint, wood, or fabric; screen images can mislead. Check color-rendering information too, especially where food or artwork needs to look natural. One detail is easy to miss: mixing different color temperatures on one track can make the room feel uneven. I would still test the arrangement at night, because daylight hides a few flaws.

How to Choose Magnetic Track Lighting - Select Compatible Fixtures, Beam Angles, and Light Color

Lighting Need Suitable Fixture Type Compatibility Checks Typical Beam Angle Suggested Light Color Useful Selection Notes
General room illumination Linear LED module or wide-beam spotlight Confirm the fixture is designed for the exact track system, including its voltage, connector, polarity, and physical profile. 60°–120° for a broad spread; linear modules may use a diffused lens rather than a defined beam. 3000K for a warm, relaxed feel; 3500K–4000K for a more neutral appearance. Use several evenly spaced fixtures where needed. Check lumen output and room layout rather than relying on beam angle alone.
Accent lighting for artwork or display objects Adjustable spotlight Check that the adapter fits the rail and that the fixture is compatible with the track’s electrical system. Verify aiming range and any dimming requirements. 15°–30° for a concentrated accent; 30°–40° for a wider highlight. 3000K is often used for warm interiors; 3500K–4000K can suit cooler palettes. Choose a high color-rendering rating when color accuracy matters. Position and aim the light to limit glare and reflections. For artwork, avoid prolonged exposure to intense light, especially for light-sensitive materials.
Kitchen counters and work surfaces Linear module or multiple adjustable spotlights Match the fixture to the track system and confirm that the track power supply can support the combined load of all connected fixtures. 30°–60° for focused work lighting; wider distributions can help cover longer surfaces. 3000K–4000K, selected to complement the room and task. Arrange fixtures to reduce shadows from the user’s body. Consider a high CRI (color rendering index), such as 90 or above, when accurate food colors are desired.
Hallways and circulation areas Linear module or wide-beam spotlight Verify track and fixture compatibility, and check the manufacturer’s spacing and load guidance for the selected system. 40°–60° for general coverage; wider light distributions can reduce gaps between pools of light. 2700K–3000K for a warmer residential look; 3000K–4000K for a neutral effect. Use consistent color temperature along the same run for a more uniform appearance. Review the lighting layout to avoid dark patches.
Retail shelving or product displays Adjustable spotlight, narrow-beam spotlight, or linear module Check mechanical fit, electrical compatibility, dimming method, and total connected load. Do not assume fixtures from different track systems are interchangeable. 15°–30° for individual products; 30°–60° for broader shelves. 3000K–4000K, with a high CRI where faithful product colors are important. Use adjustable fixtures to direct light onto products while controlling glare. The best color temperature depends on the merchandise and surrounding lighting.
Low-glare ambient lighting Diffused linear module or fixture with a suitable glare-control accessory Confirm that accessories are approved for the specific fixture and that the fixture’s adapter matches the track system. Typically broad or diffused; refer to the fixture’s photometric information rather than assuming a spotlight beam angle. 2700K–3500K for a softer residential atmosphere. Look for shielding, diffusion, and suitable placement. A broad distribution can improve coverage, but positioning and mounting height also affect glare.
One room with dimming control Dimmable spotlight or linear module Confirm the fixture, driver, power supply, and control method are all compatible. Check whether dimming is supported by the system and control device. Choose the angle based on the task: 15°–30° for accenting, 40°–60° for wider coverage. Choose a consistent CCT across fixtures; dim-to-warm behavior is available only on products specifically designed to provide it. Do not assume every magnetic track fixture dims or changes color temperature. Check the product specifications before installation.

Before buying: Magnetic track lighting systems are not universally interchangeable. Confirm the track’s rated voltage, connector and polarity, fixture compatibility, power-supply capacity, dimming method, and installation requirements in the system documentation. Beam-angle ranges and color-temperature suggestions are general guidance; check each fixture’s specifications and photometric data.

Verify Safety Standards, Installation Needs, and Future Flexibility

Choosing magnetic track lighting starts with evidence, not appearance. Check that the track, power supply, and connectors meet recognized safety standards in your region. Read the installation instructions and confirm the voltage, maximum load, and compatible components. A tidy-looking system may still be unsuitable if its driver is undersized. Keep the product documents; they make future replacements less guesswork.

Before ordering, check the ceiling structure, power location, and track dimensions. Mark the proposed route with masking tape, then check door swings and nearby cabinets. Track needs secure support; drywall alone may not be enough. Measure twice. For electrical connections, use a qualified electrician when the work requires it. Think ahead, too: can you add or move fixtures later, and will replacement parts remain available? Some systems use connectors that limit your choices. It is easy to overplan, but one extra spotlight may not solve poor room lighting.

Tips: Photograph the wiring and track layout before installation. Save spare connectors, note the system’s load limit, and leave room near the feed point for maintenance. Small records help later.